
How to Make Healthier Dry Mead at Home With Less Sugar

Most alcoholic drinks hide more sugar than people expect. Sweet wines, flavored hard ciders, cocktail mixers, and many commercial meads can taste smooth because they leave sugar behind or add it back after fermentation. Dry mead takes a different path. It starts with honey, water, and yeast, then gives the yeast enough time and the right conditions to eat through the sugars.
The result is crisp, clean, and very different from the sticky-sweet mead many people imagine.
This guide walks through a simple 1-gallon batch of dry mead made with fewer unnecessary additives, no backsweetening, and natural flavor options. “Healthier” does not mean alcohol is a health food. It means choosing simpler ingredients, reducing residual sugar, and making a drink where you control what goes into the fermenter.
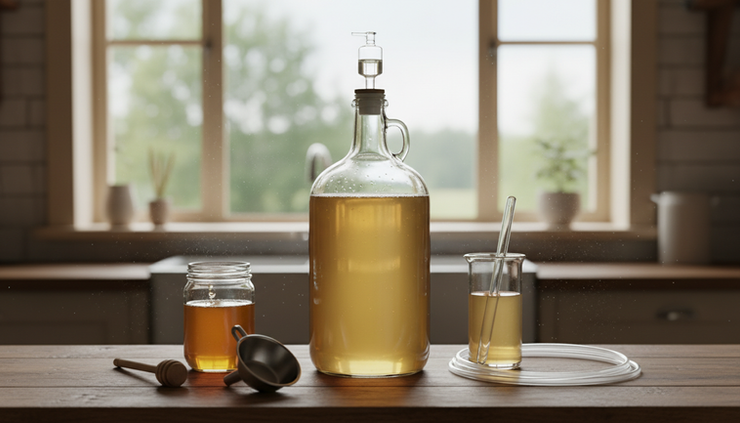
What makes dry mead a better homemade option
Dry mead is mead with little to no residual sugar left after fermentation. Yeast converts the sugars in honey into alcohol and carbon dioxide. When the yeast finishes the job, the mead tastes less sweet and more wine-like.
A homemade dry mead gives you control over four things that are hard to control with store-bought bottles:
Sugar level
You can ferment to dryness and avoid backsweetening.
Ingredient quality
You can use real honey, clean water, fruit, herbs, spices, and nothing artificial.
Alcohol strength
You can design a lower or moderate alcohol mead instead of making a heavy, syrupy drink.
Flavor
You can add citrus peel, berries, tea, ginger, oak, herbs, or spices without using commercial flavor syrups.
Many store-bought meads are finished sweet because sweetness sells. Some are stabilized and sweetened after fermentation. Others may use concentrates, flavorings, or added sugar to create a consistent product. Truly dry, unbacksweetened mead with a natural flavor profile can be hard to find in regular stores. Making it at home is often the easiest way to get that exact style.
Gather simple ingredients and safe equipment
This recipe makes about 1 gallon of dry mead. That gives you enough to learn the process without committing to a large batch.
Ingredients for a 1-gallon dry mead
Ingredient | Amount | Why it matters |
Honey | 2 to 2.5 pounds | Less honey means less starting sugar and a drier, lighter mead |
Spring water or filtered water | Enough to reach 1 gallon | Clean water helps fermentation and flavor |
Wine yeast | 1 packet | A reliable yeast finishes cleaner than random wild fermentation |
Yeast nutrient | Use package directions | Honey lacks nutrients yeast need |
Optional lemon or orange peel | Small strip, no white pith | Adds brightness without sugar |
Optional tea, herbs, berries, or spices | Small amounts | Adds flavor naturally |
For a drier mead, stay near 2 pounds of honey per gallon. That makes a lighter, less sweet mead than many traditional recipes. If you use much more honey, the yeast may leave sweetness behind, especially if the alcohol level rises past the yeast’s comfort zone.
Equipment you need
1-gallon glass carboy or food-grade fermenting jug
Airlock and bung
Sanitizer made for brewing
Funnel
Long spoon or wine degassing wand
Hydrometer and test jar
Auto-siphon or racking cane
Bottles and caps or corks
The hydrometer is not optional if the goal is dry mead. Taste can fool you. A hydrometer tells you how much sugar remains by measuring gravity.
A finished dry mead usually reads close to 1.000 or below on a hydrometer. Some dry meads finish around 0.996 to 1.000, depending on alcohol level and dissolved solids. The exact number matters less than seeing that fermentation has fully stopped and the gravity reading stays stable over several days.

Step 1. Sanitize everything that touches the mead
Clean equipment first, then sanitize it. Cleaning removes visible residue. Sanitizing reduces unwanted microbes that can spoil flavor.
Sanitize the fermenting jug, bung, airlock, funnel, spoon, hydrometer test jar, and anything else that will touch the must, which is the honey-water mixture before fermentation.
Do not skip this step. Mead can take weeks or months to finish. A small sanitation mistake early can become a sour, musty, or medicinal flavor later.
Step 2. Choose honey that tastes good on its own
Honey is the main flavor source, so use one you would enjoy by the spoonful. A mild wildflower, clover, orange blossom, or local raw honey can all work well.
Raw honey is fine, but do not assume raw means safer or automatically better. Fermentation safety comes from sanitation, healthy yeast, and proper handling. If the honey has a strong barnyard, smoky, or bitter flavor, those notes can become stronger after fermentation.
For a lighter dry mead, avoid adding refined sugar, corn syrup, fruit juice concentrate, or sweetened flavor syrups. Honey already supplies enough fermentable sugar.
Step 3. Mix a lower-sugar must
Warm about half a gallon of water. It should feel warm, not hot. High heat can drive off delicate honey aromas.
Add 2 to 2.5 pounds of honey to the sanitized fermenting jug or a sanitized mixing vessel. Pour in the warm water and stir until the honey dissolves. Top up with cool water until the total volume is close to 1 gallon, leaving a little headspace for foaming.
Take an original gravity reading with the hydrometer and write it down. This number tells you how much sugar you started with. It also helps you estimate alcohol later.
A lower starting gravity helps in two ways. It keeps the final drink lighter, and it gives the yeast a better chance of finishing dry. Overloading yeast with too much sugar can stress fermentation and leave sweetness behind.
Step 4. Pick a yeast that can finish clean and dry
Use a wine yeast rather than bread yeast. Bread yeast can ferment, but it often leaves odd flavors and unpredictable results.
Good yeast choices for dry mead include common wine yeasts that tolerate moderate alcohol and ferment cleanly. Champagne-style yeast can finish very dry, but it may strip some floral honey character. White wine yeast can preserve more aroma. Mead-specific yeast blends can also work well if they are made for dry finishes.
Look for a yeast that matches your goal:
Dry finish
Moderate alcohol tolerance
Clean aroma
Good performance at normal room temperatures
Avoid relying on wild fermentation for a first batch. Wild mead can be interesting, but it is less predictable and can produce sharp, funky, or stalled results.
Step 5. Feed the yeast so it can eat the sugars
Honey is rich in sugar but low in the nutrients yeast need. Without nutrients, yeast may struggle, produce harsh flavors, or stop before the mead is dry.
Use a wine or mead yeast nutrient according to the package directions. Many home mead makers prefer organic nutrient blends, which feed the yeast without the harsh edge that can come from overusing chemical nutrients.
Add nutrient in small portions during the early active fermentation instead of dumping in a large amount all at once. This supports a steady ferment and helps the yeast finish the sugars cleanly.
A healthy fermentation is one of the best ways to reduce residual sugar. If the yeast stays active and comfortable, it can finish the job.

Step 6. Ferment at a steady temperature
Attach the airlock and place the jug somewhere with a stable temperature. Most wine yeasts do well in a cool room, often around the mid 60s to low 70s Fahrenheit, depending on the strain.
Temperature swings can stress yeast. Too warm can create hot, solvent-like flavors. Too cold can slow fermentation or cause it to stall.
During the first few days, fermentation may foam and bubble actively. Swirl the jug gently once or twice a day early on to release carbon dioxide and keep yeast in suspension. Do not shake violently once fermentation slows, since oxygen exposure later can dull the flavor.
The airlock bubbling will slow down, but bubbles are not a complete measure of progress. Use the hydrometer.
Step 7. Let the yeast finish all the sugars
This is the key step for a no-sugar dry mead. Give the yeast enough time to finish.
After the active bubbling slows, take a gravity reading. Sanitize the equipment before sampling. If the reading is still above 1.000, the mead may not be fully dry yet. Let it continue.
Check again a few days later. When the gravity is close to 1.000 or lower and stays the same across repeated readings, fermentation has likely finished.
Do not backsweeten if your goal is dry mead. Backsweetening means adding honey, sugar, juice, or syrup after fermentation. It can taste good, but it defeats the purpose of making a dry, lower-sugar mead.
If the mead tastes too sharp at first, wait. Young dry mead can taste thin, hot, or tart. Time softens rough edges.
Step 8. Rack the mead off the sediment
When fermentation is complete, a layer of yeast sediment will settle at the bottom. This is called lees. Leaving mead on a thick layer of lees for too long can sometimes create bready or bitter flavors, depending on conditions.
Use a sanitized auto-siphon or racking cane to transfer the clear mead into another sanitized jug. Leave the sediment behind. Top up carefully if needed to reduce headspace.
Let the mead clarify for several more weeks. It may go from cloudy gold to clear pale straw. Patience gives dry mead a cleaner, more refined taste without adding sugar.
Step 9. Add natural flavor without adding sugar
Dry mead does not need to be plain. The trick is choosing flavor additions that add aroma, acidity, bitterness, or spice rather than sweetness.
Good natural options include:
Citrus peel
Use lemon, orange, or grapefruit zest with no white pith. It adds lift and brightness.
Berries
Use whole berries sparingly. They add color, tannin, and tart fruit notes, though they may restart fermentation if added before the mead is stable.
Tea
Black tea, green tea, hibiscus, or rooibos can add tannin and structure. Brew it strong, cool it, then add in small amounts.
Ginger
Fresh ginger gives heat and freshness without sugar.
Spices
Cinnamon, clove, cardamom, and star anise are powerful. Use tiny amounts and taste often.
Oak
Oak cubes or spirals can add vanilla, toast, and body. Use light amounts and sample regularly.
Herbs
Rosemary, thyme, lavender, mint, or basil can work, but they can become overpowering fast.
For the cleanest result, add flavor after primary fermentation. Put the addition into the cleared mead for a few days to a few weeks, then taste. Remove it when the flavor is where you want it.
A dry mead with lemon peel and black tea can taste crisp and wine-like. A dry mead with ginger and hibiscus can taste bright and tart. A dry mead with oak and orange peel can feel rounder without sugar.

Step 10. Bottle only when fermentation is stable
Do not bottle early. If sugar remains and fermentation continues in a sealed bottle, pressure can build. That can gush, pop corks, or break bottles.
Bottle still dry mead only when:
Gravity is stable over several days
The mead is mostly clear
No active fermentation signs remain
Flavor additions have been removed
Bottles and siphoning equipment are sanitized
If you want sparkling dry mead, learn safe bottle conditioning first and use proper pressure-rated bottles. Still mead is the better first project.
After bottling, let the mead rest. Dry mead often improves with time. A bottle that tastes sharp after a month may taste smoother after several more months.
Common mistakes that leave mead sweet
If dry is the goal, avoid these common choices:
Mistake | What happens instead |
Using too much honey | Yeast may stop before all sugar is gone |
Skipping nutrients | Fermentation can stall and leave sweetness |
Fermenting too warm | Harsh flavors can cover delicate honey notes |
Bottling too early | Fermentation may continue in the bottle |
Adding fruit juice late | Sugar returns and may restart fermentation |
Backsweetening | The mead is no longer dry |
The basic rule is simple. Start with a manageable amount of honey, use healthy yeast, feed it properly, keep the temperature steady, and wait until the hydrometer confirms dryness.
Why homemade dry mead is different from store-bought
Store-bought alcohol is built for shelf stability, consistency, and broad appeal. That often means sweetness, filtration, stabilizers, flavor correction, or blending. None of those things are automatically bad, but they limit control.
At home, you can make a drink that fits a narrower goal: dry, simple, natural, and not loaded with extra sugar. You can choose the honey, stop adding sweeteners, skip artificial flavors, and shape the final taste with real ingredients.
You also learn what balance really means. A dry drink needs more than sweetness to taste good. Acidity, tannin, aroma, body, and time all matter. Once you understand those pieces, you can make fermented drinks that taste complete without relying on sugar.
What success tastes like
A well-made dry mead should taste clean, crisp, and lightly floral. It should not taste syrupy. It may remind you of a dry white wine, but with a soft honey aroma in the background.
The best signs are:
A stable final gravity near or below 1.000
No cloying sweetness
Clean aroma with no rotten, musty, or solvent-like smell
Balanced flavor from natural additions
A finish that feels crisp rather than sticky
Give the first batch time before judging it. Dry mead can seem plain when young, then become smoother and more expressive as it rests.
Making healthier dry mead at home is less about complicated brewing tricks and more about restraint. Use good honey, use less of it, support the yeast, let fermentation finish, and build flavor with real ingredients instead of sugar. The reward is a homemade bottle that is hard to find on a store shelf: dry, clean, personal, and made exactly the way you want it.


Comments